Showing posts with label Cricut Paper Dolls Dress-Up. Show all posts

Wednesday, September 5, 2012

My Craft Spot Stamp Release Party Day 3 - Best Witches to You

Hello Everyone!  Welcome to Day 3 of our week long Stamp Release Party at My Craft Spot!  We are half way through the week and what do you think so far?  Have you been inspired and are you excited for the big reveal on Saturday?  Well, today we are sneak peeking the another new Halloween set called Best Witches to You and what an super fun set this is to have in your collection! 

This ghost from Paper Dolls Dress up is one of my all time favorites!  I think I use it in some manner every year!  This card is a simple black and white with lots of layers and doodling! 

This cute little sentiment is layered on and accented with a Midnight Black Crinkle Ribbon accent and Black Twinery Twine bow!

I used my Gypsy to weld two ghosts together to form the base then I popped each layer with dimensionals.

This adorable inside sentiment is a combination of two stamps from the new Best Witches to You!  I love it!
I hope this insires some fun Halloween cards for you!  All the new sets will be revealed and available for purchase on Saturday but make sure to check out all the beautiful projects today using Best Witches to You at My Craft Spot! Thanks for stopping by today and please stop back again tomorrow for another sneak peek!

Monday, August 6, 2012

My Craft Spot Monday Challenge #65 - Invitations and Announcements

Good morning!  Today we have another fun challenge for you at My Craft Spot along with a great prize to be won!  We are challenging you to create fun Invitations or Announcements for parties, weddings or babies!  Here is my Baby Shower invite!

I made these cute little Cowboy themed invitations in the shape of cowboy hats!  I used my gypsy to stretch and weld the hats from Paper Dolls Dress Up and added a little sheriffs star from Create A Critter.  I then outlined the entire invite with my black journaling marker.  The little star is stamped with part of a sentiment from My Craft Spots New Arrival Stamp Set.

Inside I used the entire "Baby Shower" sentiment and the invite stamps from New Arrival.  These invitations are a little simple but I needed to make a lot in a small amount of time so they will do!  I can't wait to share the fun pics for this Little Cowboy Shower!   


You have until next Monday to share your creative Invitations and Announcements with us at My Craft Spot!  Make sure you check out the rest of the amazing invitations and announcements the DT created for your inspiration!  Thanks for stopping by today!

Monday, January 23, 2012

My Craft Spot Ch #42 Let's Hear it for the Boys!

Goodmorning Everyone!  With a house full of pink I find it so easy to make lots and lots of "girly" cards so when I saw the challenge this week at My Craft Spot, I was excited!  "Let's Hear it for the Boys" gives me a chance to add to my very small stash of boyish cards!  I posted a Boy Birthday card yesterday and I have another for you today!


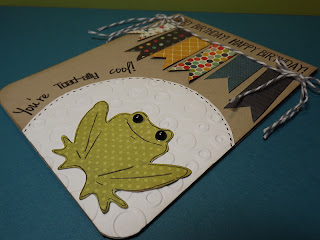
I used the Build a Valentine stamp set from My Craft Spot again!  I must say I am loving all the birthday cards I've created quickly with this stamp set!  The banner was made with all the little scraps from the last few cards I made and the little toad is from Paper Dolls Dress Up!  He is so cute!  Stop by My Craft Spot this week if you need to add to your boy stash and "Let's Hear it for the Boys"!!


Monday, October 17, 2011

My Craft Spot Challenge #30 - 3D Halloween

Hello Everyone!  It is another beautiful fall day here and Halloween is right around the corner!  I love making all kinds of spooky goodies for my girls and my friends!  Can you guess where I am going with this?  This week at My Craft Spot we have another fun Monday Challenge...3D Halloween!  We want to see your 3D Halloween projects and treat packages!  Here is what I made for your inspiration!

It is cold/flu season so I have been giving everyone little hand santitizers from Bath & Body Works for Halloween!  This little box is a special gift for a special friend! 

The little ghost is made in the same manner as the pumpkins I made for the Fall/Halloween blog hop last month.  The idea for a 3D ghost came from Holly at Ribbon's & Glue.  I cut 6 ghosts from Paper Dolls Dress-Up, folded 5 of them and adhere them together onto the 6th ghost.  My daughter wanted a girl ghost so I had to add a bow made with this delicious Orange Licorice Bakers Twine (available at My Craft Spot)!

I used Candy Corn Kisses for the tag and several Halloween colors of Crinkle Ribbon for the bow. 

Please join us this week at My Craft Spot for our 3D Halloween challenge!  If you haven't seen them, make sure you check out the amazing projects from the My Craft Spot DT and have you met the new talented Design Team members yet?  If not, you can HERE!  Thanks for stopping by today! 

Products Used:
  • My Craft Spot
    • Candy Corn Kisses Stamp Set
    • Black Diamond Crinkle Ribbon
    • Deep Purple Crinkle Ribbon
    • Toadally Green Crinkle Ribbon
    • Deep Purple Crinkle Ribbon
    • Orange Licorice Bakers Twine
  • Basic Grey Eerie Paper
  • Walmart Glitter Paper
  • Cricut E2 and Gypsy
    • Paper Dolls Dress-Up

Monday, August 22, 2011

My Craft Spot Sneak Peek - Candy Corn Kisses

Hello Everyone!  Today starts our week long Stamp Release Party at My Craft Spot!  WooHoo!!  Kimberly is releasing four new stamp sets this week and they are all fabulous!  I am so excited to be giving you one of the first Sneak Peeks today of the new stamp set, "Candy Corn Kisses"!   This set is as cute as it sounds and is packed full with super fun Halloween stamps!  There are so many fun stamps in this set, that I had a hard time picking just one to show you today, so of course, I used a few!  I cannot stop playing with this set!  Here is my first sneak peek!

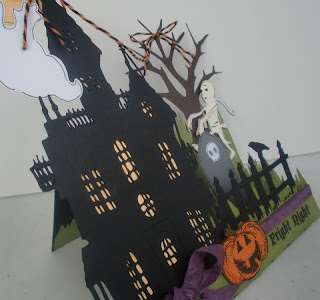
I have been wanting to make a step card for some time.  Since I LOVE Halloween, I thought this would be the perfect time to make one! 

I love this fun "Fright Night" stamp and I have been finding so many ways to use it! 

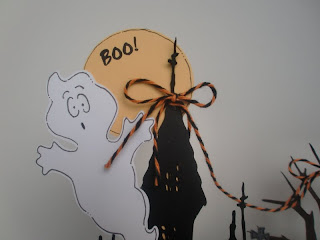
...and what would a super cute ghost be without a "BOO!"

Here is a look at the layers and of the Crinkle Ribbon Bow.  I also tied on some of the super cute Halloween Bakers Twine which is now available at My Craft Spot!  I had planned on adding a banner to it, but it would not hang the way I liked!


...and now for my second sneak peek for today!

I needed a birthday card for my best friend!  Her birthday is coming up and she loves everything fun about Halloween! 

I absolutely LOVE this stamp and I thought it would be perfect for her Birthday card!  What do you think?

I also added a gorgeous My Craft Spot Crinkle Ribbon bow to this card to match the inking around the sentiment!  I just found Tiddlyinks so I had to play with some of the adorable Halloween images.  


I'll have more details on both of these projects tomorrow!  If you are loving what you see, then go to My Craft Spot to see all the amazing sneak peeks from Kimberly, Marlene, Aymee and Amy!  We are going to be sharing so many fun projects all week long showcasing the four new stamp sets and ending with a fun Blog Hop on Friday!  There are going to be fun prizes all week, so make sure you check it out!

Stamp Release Party Giveaways:
Each day this week Kimberly will have a fun prize for you from My Craft Spot!  Then, on Friday, each stop on the Hop will be giving away one of the new stamp sets! (That is 9 stamp sets - Woohoo!)  There are so many ways to win so make sure you stop by My Craft Spot to check out our Stamp Release Party!
Thanks for stopping by today! 

Sunday, June 12, 2011

Birthday Sundaes #13 - Birthday Card with Embossing

It's Birthday Sundaes time again!  The Design Team has come up with some amazing cards to inspire you this week!  Our challenge #13 is Embossing!  You can use heat or dry embossing on your Birthday card!  Here is my embossing creation!

I used several different embossing folders on this card because hey, it's an embossing challenge..hehe!  The Turquoise background is embossed with Spots & Dots, the sand with Swiss Dots, the Green Octopus is Tiny Bubbles and I think the embossing on the seaweed is called Textile Textures!  I layered all my embossing fun onto an Orange card base!  I'm entering this fun creation into the Color Challenge at My Pink Stamper this week!  Can you tell what the colors are? 

I added little goggle eyes to the cute little octopus and inked him some cheeks! Everything is outlined, inked and popped up (after being embossed of course) to create this fun little ocean scene! 
Products Used:
  • Stampin' Up!
    • Tangerine Tango Cardstock
    • Whisper White Cardstock
    • Tempting Turquoise Cardstock
    • Crumb Cake Cardstock
    • Garden Green Cardstock
    • Family Phrases Stamp Set
    • Soft Suede Ink
    • Melon Mambo Ink
    • StazOn Ink
    • Oval Punch
  • Bo Bunny Kiwi Double Dot Paper on the Octopus
  • Cricut E2 & Gypsy
    • Create A Critter Cartridge
    • Paper Dolls Dress Up Cartridge
  • Cuttlebug Embossing Folders
    • Spots & Dots
    • Tiny Bubbles
    • Swiss Dots
    • Textile Textures
  • My Craft Spot Mandarin Bakers Twine (Click HERE to order)
  • Journaler Pen
  • Google Eyes
Challenges:
Birthday Sundaes Challenge #13 Embossed Birthday
My Pink Stamper Color Challenge Orange, Turquoise and Green

There is still one day left to enter the Orange, Turquoise, Green Color Challenge at MPS and you have an entire week to play along with our Embossing Challenge at Birthday Sundaes!  Make sure you check out the rest of the DT cards at Birthday Sundaes for some inspiration!  I can't wait to see what everyone comes up with!  Thanks for stopping by!

Friday, April 22, 2011

MMM... LO

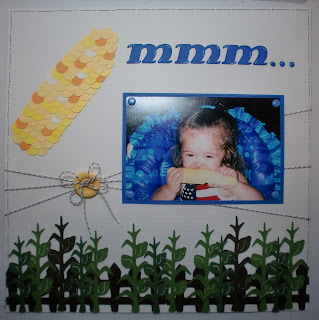
One last post for today!  This one is for the Getting Scrappy Challenge.  Last Saturday's challenge was Fun with Food.  This is the layout I played with for the challenge.  It's very simple because I'm running out of time this week! 
I'm sure many of you have a ton of pics with your little ones eating corn on the cob!  It is one of the funniest foods for them to eat because a lot of times, the cob is bigger than their heads!  This is my Oldest E's first corn on the cob pic!
I could have cut the cob with my Country Life but I like the effect I got from using my 1/2 circle punch to make it! 
I added a little corn field using one of the Paper Dolls carts.  I also added some Baker's Twine from My Craft Spot and a Stampin' Up! Button. 
I'm keeping this short because I am running out of time to get it linked.  I had planned on making a layout for the Hanging with my Peeps challenge too but there just was not enough hours in the week!   Thanks for stopping by today!  Have a great night!

Monday, March 14, 2011

Signs of the Time LO

I haven't had much scrapping time today but I did get the chance to make one Spring layout.  This is my Signs of the Time LO.     

Last week I won Top Chef at Cooking with Cricut and won a free Digi Stamp!  I have to admit that I've never used Digi Stamps before.  I didn't even know if I would because I didn't have a functional printer.  Well, guess what...I sat up all night last night and got our printer to work with my laptop just so I could play with this Digi!  I wish I would not have done it on the first night of Daylight Savings Time but it is working!!  My coloring skills are a little rusty (I spend most of my time coloring with crayons these days) but I love how cute this little guy is!!

For the CWC challenge there needs to be a time piece on my project so I cut out the months of Spring from a calendar and popped them up on the sides of the title.  I cut the title from a scrap piece of tie dyed looking paper.  I love how it turned out!

This is the first and last time I've ever used Walk in My Garden.  I borrowed it from a friend so it is not loaded in my gypsy (definetly a cart you need the gypsy for)!  The flowers are so cute but they have so many pieces that need cut in different colors!

I can't wait for Spring so I can get some great pics of the girls out in the flower bed!!

Products Used:
  • Stampin' Up! CS (background piece)
  • Scrap Pile Paper and CS
  • Walk in My Garden Cricut Cartridge
  • Hello Kitty Fonts Cricut Cartridge
  • Paper Dolls Dress Up Cricut Cartridge
  • Digi Stamp from  Papercraftingworld.com
  • SU Stampin' Write Markers
  • SU Cute as a Bug Stamp Set (Cricket Stamp)
  • Sandylion Ant Stickers  
Challenges:
Cooking with Cricut Challenge #20 Time to Spring Forward
Craft Us Crazy Challenge #3 Be One with Nature
Scraps 4 Fun Use your Scraps Challenge

Thanks for stopping by today!


Friday, March 11, 2011

Native Pride Baby LO

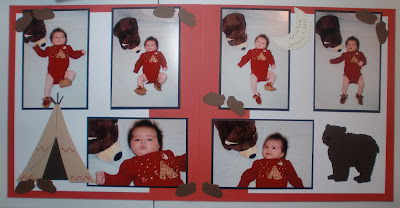
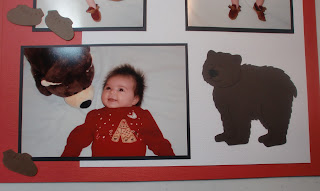
Another layout to share for today.  Die Cuttin Divas Challenge #5 is Baby Love.  This LO is for my youngest Es baby book.  These pics were taken when she was just 6 weeks old and she is so tiny (well tiny for her, she was a 9lb baby)!  This is such a special LO because it is with her moccasins.  My children's Nokomis (grandmother) makes each one of the grandkids a very special pair of moccasins when they are born.  Each one is uniquely made for each kid.  E #3's were my favorite and they were brown, red and black.  I was so thrilled when I found this cute onesie that matched her moccasins perfectly that I took about 50 pics!  Here is the LO I made to match her attire that day! 

This LO is not completely true to the traditions of their family's tribe.  Their tribe built wigwams not tepees but like I said, I was making the LO to match the attire.   

I added a creasant moon just like the onesie and journaled on it.

I placed her Bear with her in the pics and on the LO because she is Bear Clan! 

Not your traditional Baby LO colors but I LOVE the way it turned out!  I'm busy scrapbooking today so stop back later for some more fun LOs!!

Products Used:
  • American Crafts CS
  • Paper Dolls Dress Up Cricut Cartridge
  • Animal Kingdom Cricut Cartridge


Thursday, March 10, 2011

Sham-rockin' St. Patty's Day Card

Another card here using my scraps for Sonia's Use Your Scraps Challenge.  This one went together pretty quickly because I used the sketch from Peachy Keen Stamps.  If you are looking for a St. Patty's Day LO click here.  My only problem is that I can't decide which orientation looks better.  Which one do you like better #1 or #2?

       
I think I like #1 better!  Now I was quite surprised when I was finished because I realized this green I used for the card base was a very scrappy piece!  Looks like I've got some more work to do!  I'm going to cover it with a white mat on the inside!

Products Used:
  • Scrap Paper
  • Paper Dolls Dress Up Cricut Cartridge (Shamrock)
  • Twinkle Toes Cricut Cartridge (Music)
  • Peachy Keen Critter Faces Stamp Set
  • My Creative Time I Believe in Leprechauns Stamp Set
  • Stampin' Up Circle Punch
  • Michael's Glitter Ribbon (for some Bling)
  • Queen & Co. Nightfall Pearls (for a little more Bling)
  • Signo White Gel Pen
  • Stickles
Challenges:
Peachy Keen Stamps Sketch Challenge 47 Think Bling
Crafting with Christina Challenge #18 St. Patty's Day Theme
Paper Cutz Challenge #81 St. Patrick's Day
Scraps 4 Fun Use your Scraps Challenge

Thanks for stopping by today! 

Tuesday, March 8, 2011

Celebrate the Occasion Challenge #4

I am sooooo excited today!  Do you know why?  That's right, it is my very first Design Team Day at Celebrate the Occasion!  Even though I was quite sick last week, I still made something very special for the occasion!  I could not make it to the craft store so I was limited to what I had on hand (although my mother-in-law did stop by ACMoore to pick up some shamrock pattern paper for me...thanks Mom)!
Challenge #4 for Celebrate the Occasion is St. Patrick's Day and the Design Team has some inspirational projects for you!  I created a 2 page layout for the occasion.
I used my sewing machine to stitch the shamrock paper as well as the photo mats.  I embossed with Divine Swirls Cuttlebug folder on the photo mats and added a strip of green glitter ribbon to tuck my pics under.   

I welded a bunch of clovers from Paper Dolls Dress Up together with my Gypsy to get a clover field for this cute little Leprechaun(Simply Charmed) to dance in. I sponged all the clovers and added some on top of the welded image with different brand dimensionals to get several different layers of clovers.  

Now for the bright rainbow, this element did take some thought.  There is not a rainbow on any of the Cricut cartridges that stretches well across a 2 page LO so I needed to make my own rainbow.  At first, I was going to use buttons, but I did not have enough colors on hand.  I needed to find something (beside paper) that I have a lot of and in several colors.  What did I find....RIBBON!!!!  I ran my tape runner across the entire length of the ribbon then carefully layed it out.  I really like the way it turned out! 

The pot of gold is from one of my new favorite carts, Simply Charmed!  I wanted to give it a full look so I layered it.

and for the Gold inside the pot, I cut the background out with gold paper, sponged it then adhered the top layer and stickled the edges!

Products Used:
  • Stampin' Up! Solid Cardstock
  • Recollections Gold Paper
  • Karen Foster Design Pot O Gold Collage Paper
  • Paper Dolls Dress Up Cricut Cartridge (Shamrocks)
  • Simply Charmed Cricut Cartridge (Leprechaun and Pot of Gold)
  • Country Life Cricut Cartridge (Title)
  • Divine Swirls Cuttlebug Folder
  • Michael's Ribbon
  • Stampin' Up! Ink
  • Gold Stickles

I did not make it out of the house to print my pictures but here are Mommy's Leprechauns.


Thanks for stopping by to see my first DT project!  I hope you like it!  Stop by Celebrate the Occasion and check out all the other fabulous Design Team projects and be sure to link up your St. Patty's Day project!

Monday, February 7, 2011

St Patty's Day Card, Hamster Card, Game Day Snack

Still in a funk today but I just keep crafting away.  I've been dying to use my new stamps from My Creative Time.  This stamp comes from her I Believe in Leprechauns set and I used the Paper Dolls cart.  This one is for the Mojo Monday 177 Contest. 
I was hoping it would get my "Mojo" going but its not quite there yet!  Oh well, there is always tomorrow! 
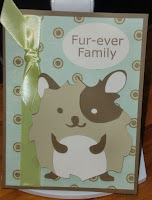
 I also wanted to post the cute little creature I made for my nephews birthday over the weekend.  I had to wait to post it until he got his card today because I didn't want my sister to see it!  This one was made with My Pink Stamper Stamps and Four Legged Friends Cart.

I do have a cute little story to share about our game day snack.  We are always asked to bring Buffalo Chicken Dip to every game, event, etc. at the cabin.  So last night I was mixing together the dish.  It is very easy, a pkg of cream cheese softened, a cup of ranch dressing, Franks Hot Sauce (I buy this in bulk and I am not sure how much I dump in but I think it may be around 8oz), about a cup of chopped celery, and a few grilled boneless/skinless chicken breasts or you can use a can or two of canned chicken. Throw it all together in a bowl, mix, bake at 350 for about 20 mins(until bubbly).  We dip tostitos in it!  I make it so often, that I can make it in my sleep!  Anyway, I did not have any chicken breasts in the freezer, so I asked my 4 year to go to the pantry and grab a can of chicken.  I love that I can do this now since she is starting to read.  I tell her to sound out the word and look at the cans.  So she comes back and hands me the can.  I opened it and had her drain it and throw it in as I'm mixing.  So as I'm mixing, I am looking at it thinking "this does not look right and it smells funny"!  OMGoodness!!!  I look at the can and she brought me "CHICKEN OF THE SEA"!!!  Needless to say, Tuna Buffalo Dip wouldn't go over well with the guys!!  My kids didn't mind having it for lunch today!  It wasn't that bad but for now on I plan on actually looking at the cans she brings me!!

Monday, January 17, 2011

The Completed Card for Charlie

I just realized I posted the 1st picture I had taken of this card.  He looked kinda blah without his stiching!  Here is the completed card that I will be sending Charlie!  TFL!